![]() |
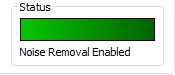
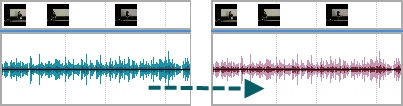
Background noise, such as the hum of the computer or people talking nearby can affect the quality of the audio in a recording. Select the Remove background noise option to reduce background noise for the audio on the Timeline.
1. In the Task List, select Audio enhancements.
2.
3. Click the Remove Noise button. Camtasia Studio detects noise in the audio by using a selection with silence.
4. The status area changes green and displays Noise Removal Enabled once complete.
5. The color of the audio waveform changes from teal to burgundy. To preview the new audio, click Play in the Preview Window. Enable and disable the Restore noise option to compare the audio quality before and after applying this option.
6. Click OK.
1. In the Task List, select Audio enhancements.
2. The Audio Enhancements pane appears. Select an area on the Timeline (less than one second) where silence should exist on the audio waveform. If no true silence exists, you may have to select an area that includes speaking or other audio. Drag the Adjust sensitivity slider to adjust the noise reduction.
3. Click the Remove Noise button. The status area changes to green and displays Noise Removal Enabled once complete.
4. To preview the new audio, click Play in the Preview Window. Enable and disable the Restore noise option to compare the audio quality before and after applying this option.
5. Click OK.Use the Adjust sensitivity slider if the noise reduction process caused the audio quality to degrade. Degradation may occur if the noise removal occurred within a selection without true silence.